Lock-down Learnings

I came into 2020 wanting to migrate to Medium Format digital for most of my landscape work, and having just started to build up a system, was then almost immediately forced into lock-down like the rest of the world. So what happens when you plan to become more slow, methodical and deliberate in your landscape photography, but then are suddenly prevented from going outside for any recreational purpose at all, apart from exercise?

Learning & Development

One of the wonderful things about photography is there is always some new to learn or improve upon. Being in lockdown presents a massive opportunity to spend some time developing our knowledge and skills. It could be practical, like learning macro photography at home, or learning aspects of our favourite processing software that we have never tried or feel could be improved on. There are many resources online, from a variety of photographers and organisations who have reduced the cost or given away their online course and resources for free, at least temporarily.

I chose to watch some of my favourite photographers on YouTube, but also some online training for software and various webinars. I also took a paid academic course in Visual Literacy. That led me to read Secret Knowledge by David Hockney, a very interesting and thought-provoking book on the use of optics in the creation of paintings and drawings over the centuries.

My 1 week, 1 walk, 1 prime project

Restricted to one walk a day, which was of necessity walking the dog, I decided to use this as my daily photographic opportunity as well. To keep to the letter and the spirit of the law, as well as deal with the practicalities of having a dog in tow, I had to impose some further restrictions on my photography.

So, I came up with the idea that for each week I would take one prime lens on my lightest camera, no filter, no tripod, in fact nothing else other than a spare battery. I would be shooting handheld on-the-go and within ten minutes or so walk from home, early in the morning.

This was an almost complete reversal of how I saw my photographic approach going at the beginning of the year. After four weeks, just as the restrictions were about to be eased in my area, I realised I had learned a massive amount from this, and it’s probably something I am going to continue to do even after the restrictions are completely lifted. Carrying such light gear can be very liberating.

_F203720.jpg

Kit evaluation & organisation

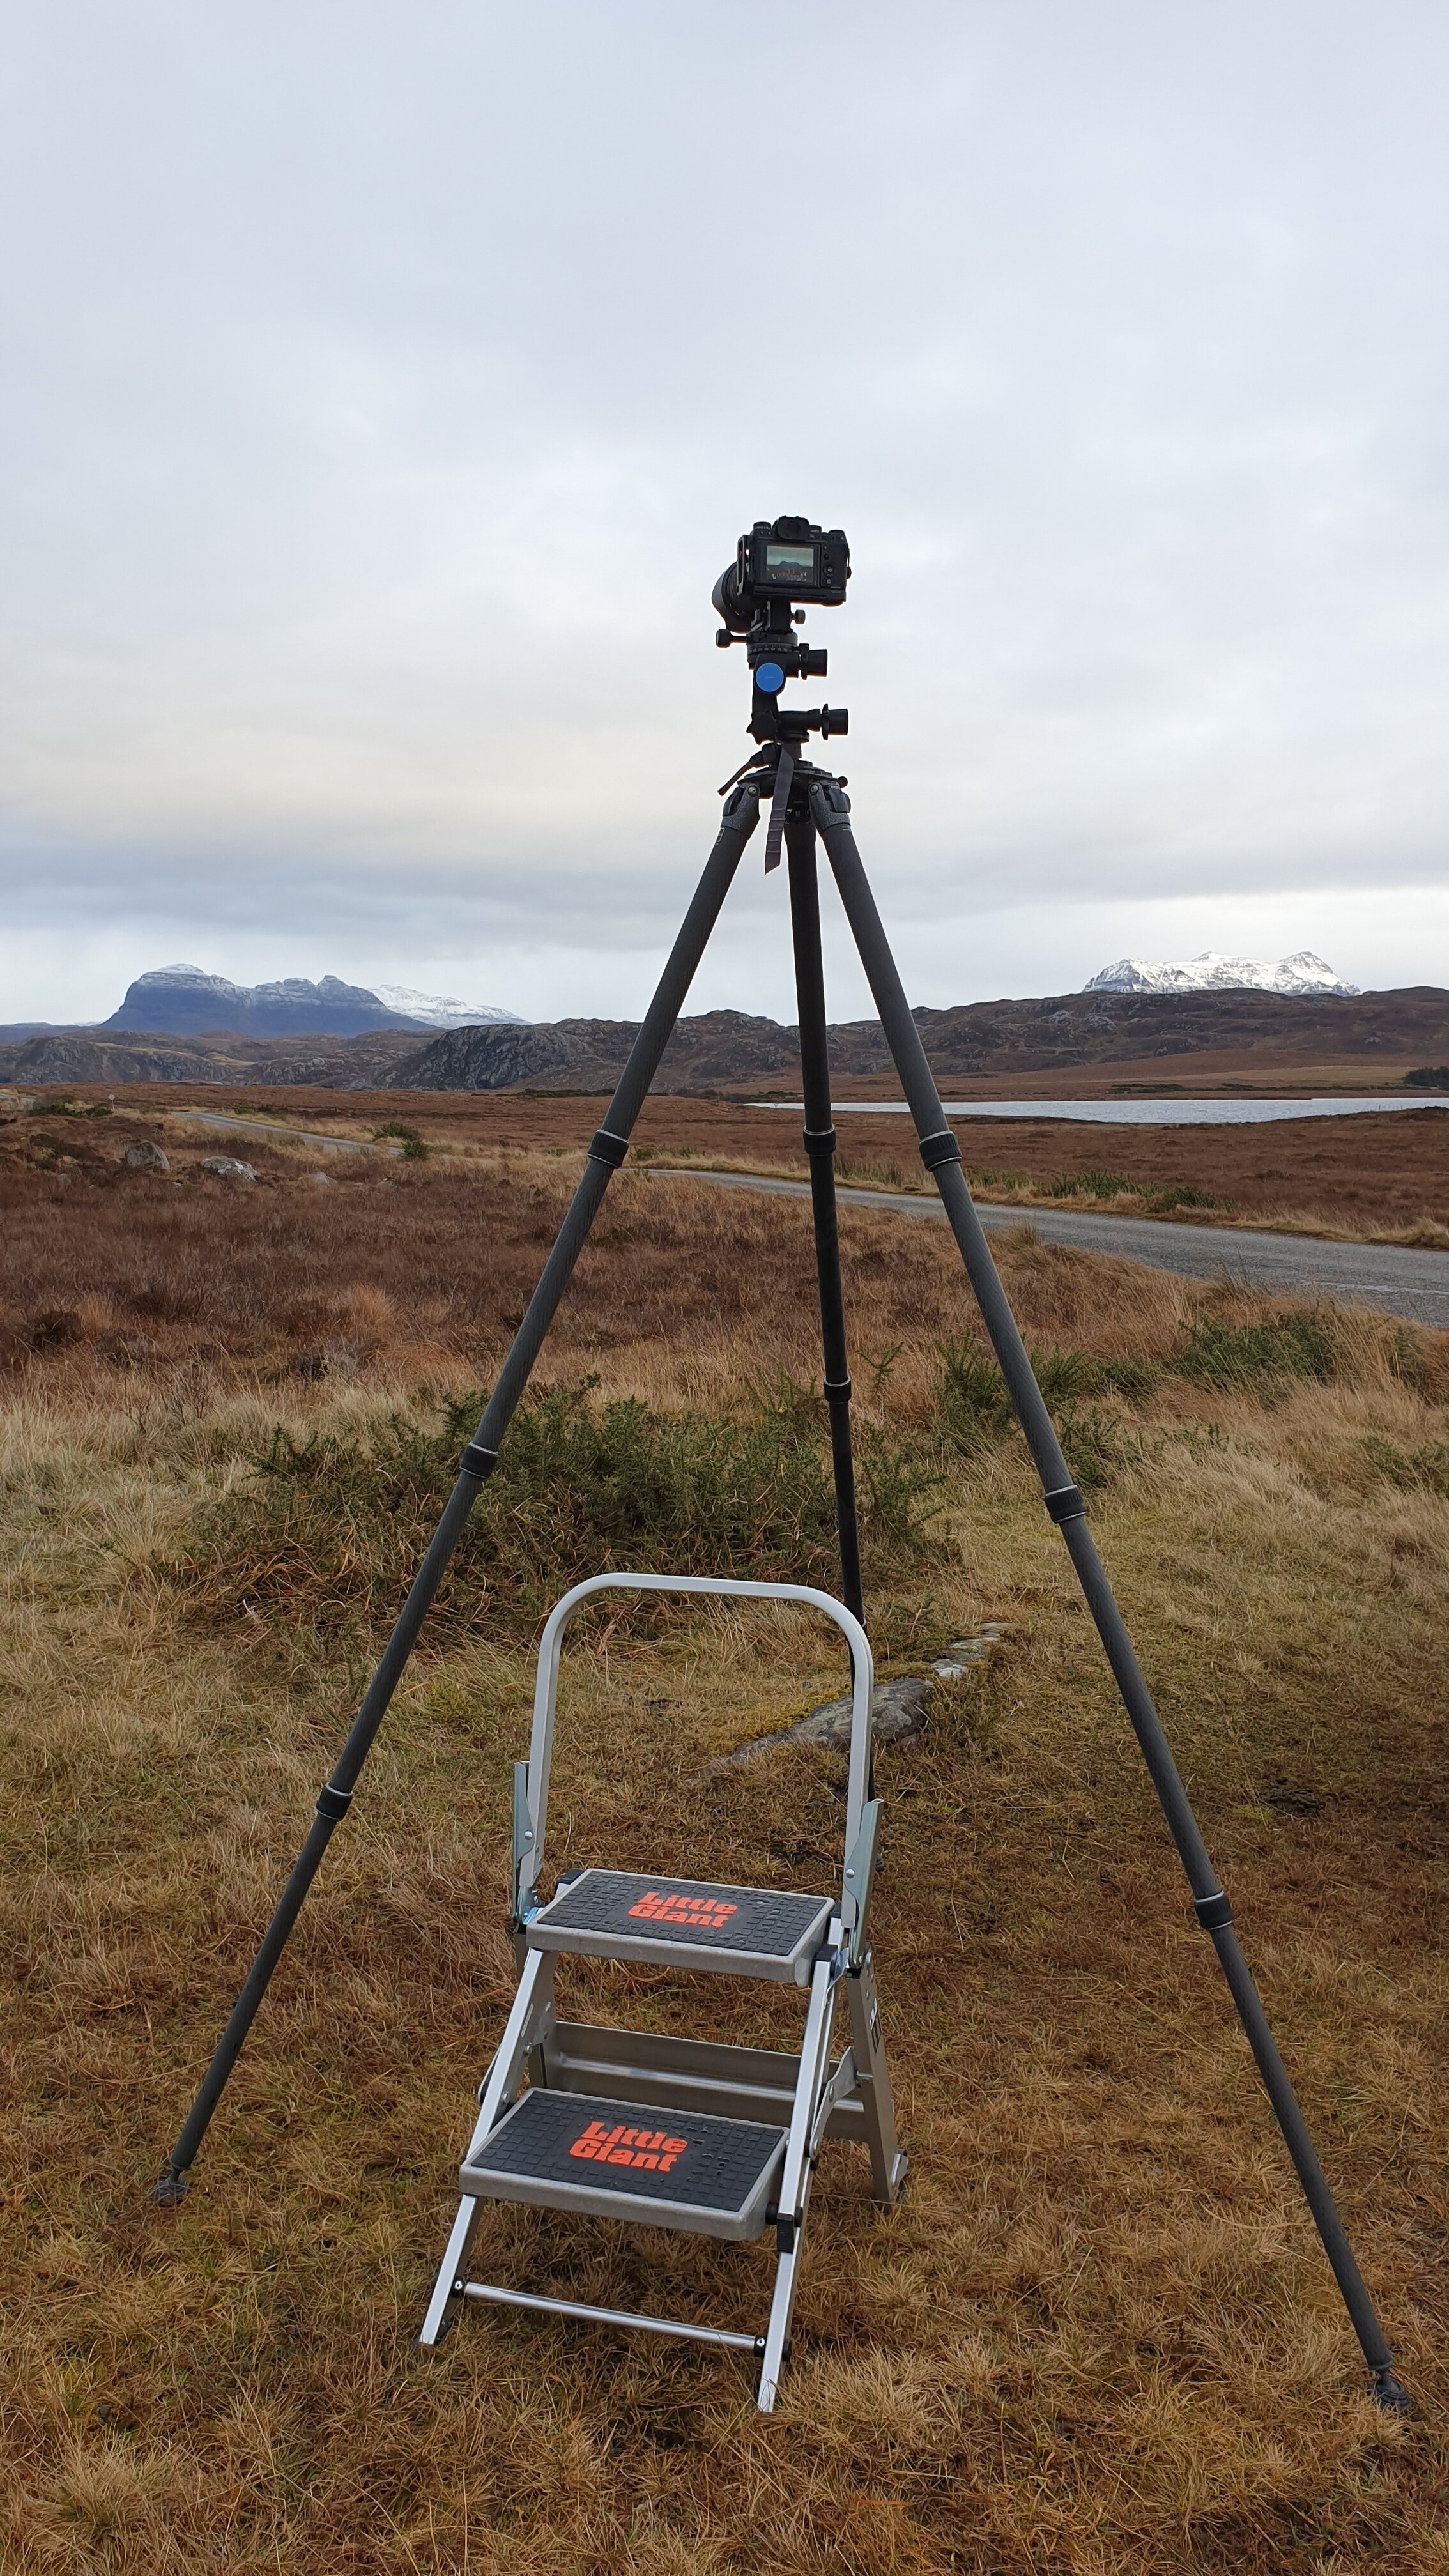
I had already sold a lot of gear to fund my move to medium format, but I took the time to take another look and pare-down or change-out further than I had before.

2020-05-28+05.17.33.jpg

In particular, I realised that focal lengths in the ‘normal’ range I don’t really find that useful. I actually sold a lens as result of this process. Although it was a really good lens, I realised why I didn’t use it often and therefore I didn’t need to hang on to it.

I also spent some time organising my gear, so that I can now lay my hands on those stepping rings, tripod spares, filter adapter rings etc., that I would previously struggle to retrieve from various bags and cupboards. Now I have everything organised and labelled.

One minor but particularly beneficial thing was finding and using these labels to organise my 100mm square filters in two Mindshift pouches. Now I don’t have to go through the exercise of pulling out four grads in order to find the one that is actually needed!

Quick Edits

I also learned that just five minutes in Capture One working on an image could produce something significantly more satisfying than the out-of-camera jpegs. That’s not to say that there is anything wrong with those, just that a few quick edits, such as adding a subtle vignette, could really lift an image out of the ordinary. Thinking like this made me consider more the post-processing as I was taking the picture, for example it there was something distracting around the edge of the frame that I could not easily avoid or remove, like a blade of grass or a twig, I would consider whether I would clone this out later or simply mask it a little with a vignette. Although I shoot usually shoot RAW, in my normal way-of-working I typically don’t do ‘quick edits’ preferring to start with the image as ‘finished’ as possible in-camera and then refine it further in Capture One and Photoshop..

_F203356 2.jpg

Other ISOs are available

Temporarily at least, I stopped being a base-ISO shooter. Of course, base-ISO is rarely an issue when shooting off a tripod, but handheld you have to raise the ISO to deal with camera shake, wind, gloomy woodlands or just dingy days.

Get on with it

Speed - as mentioned this was something I was doing whilst on a walk, so I felt that I could not spend too long composing/taking each image, so I was forcing myself to ‘see’ the image and execute it very quickly.

Intimate landscapes

I don’t live in a particular scenic area, although there is countryside all around, there are no sweeping vista or mountain ranges. But, over these few weeks I think I developed a bit of an eye for the ‘intimate’ landscape - a flower in a hedgerow, frosty leaves etc. I think taking a simpler approach, not being weighed down by equipment or expectations, helped me to see these things more clearly.

Rinse & Repeat

Of course often I often had the opportunity to repeat or try again with the same subject the next day. I also began to make a list of local subjects that are worth exploring further with a more deliberate approach, when I am able to. Some of these I know will be better at other times of the year, so I am effectively building a pipeline of ‘projects’ that I can tackle from home and when conditions are ideal.

Post-Processing Workflow

In the last year of so my post-processing workflow as moved from an assortment of programs, to mainly just one. When Capture One became available as a Fujifilm specific version, and after evaluating the free version I decided the RAW conversion of X-Trans RAW files from my Fujifilm X-T2 cameras was as good if not better than the Silkypix software bundled free with Fujifilm cameras, which in itself seemed to me to produce far better results than Adobe Camera Raw in Photoshop or Lightroom.

Before long I had moved to Capture One Pro, and since then I have consolidated my workflow mainly into this tool. Previously I would convert RAW to TIFF in Silkypix, and then work with the latter in Photoshop using Nik Collection plugins, as I had for a number of years right back to my Nikon days. It was also a consideration that I planned to move to Fujifilm GFX medium format as well and keeping a common workflow between this and the X series I already had was a big benefit.

Since moving so Capture One Pro, it seems like the tool has grown with me as Phase One seem to be on a relentless path to improve the product but also provide really useful insights and training via webinars and on-line training.

Today I do almost all of my processing in Capture One. only stepping out of this for specific requirements. I start by creating a session (only available in the Pro version), which effectively is a portable ‘project folder’ that can be moved from SSD where the work is done initially, and then to slower network drives for longer-term storage (see also my post on backups). These days I rarely fill the need to dip into Photoshop, and probably this need will decline even further given the recent updates to Capture One. Similarly, I have stopped using Nik Collection, not because there is anything wrong with it, I just feel that I can do what I need to do quicker and easier now in Capture One.

From Capture One I’ll either create a file tailored for a particular use (i.e. web or Instagram) using a specific process recipe, or I’ll print using Qimage Ultimate. Qimage takes all the hard work out of creating a good quality print, taking care completely of scaling, resolution and sharpening. Once you get the hang of it’s some-what clunky interface, it just works. Output goes to photo paper on a colour laser for quick prints/proofs, or to an Epson SC-P800 loaded (usually) with a roll of 16” paper.

One big change in my workflow in 2020 was getting a Tangent Wave Element Kb. Tangent make high quality controllers for professional photo and video production. The Element series comprises four modules, but I feel the Kb is perhaps the most useful for editing still images. It consists of a small ‘wedge’, about the same depth as a computer keyboard with 12 knobs, 2 buttons and an OLED display. It works seemlessly with Capture One, with the OLED display showing labels. The buttons can be used to cycle through 4 ‘banks’, so there are effectively 48 knobs at your disposal that can be mapped to sliders in Capture One. The OLED display updates as you cycle through the banks, so that the function of each knob is clearly identified.

2020-05-22+09.05.10.jpg

The Kb comes with a standard out-the-box map for Capture One that works well but you can easily customise this to map each knob to a particular function, using the software downloaded from the Tangent Wave website. You can even decide how fine or coarse the adjustment is, the direction of travel, and choose whether to display a progress bar or percentage that shows in the corresponding part of the OLED display for that knob. All this can be set per control, as well as globally, so you can create a map specific to how you like to work. Each knob also has a push button that resets that particular control.

The only issue I had was that the Tangent Mapper was unreadable on my 4K monitor at full resolution as it doesn’t seem to scale like all my other apps under Windows 10, so every time I wanted to use it I had to drop the resolution to 1920x1080 temporarily. Just an irritation really, as you only need to do this when you want to edit the map.

All this doesn’t come cheap, and even though I picked my unit up used but in mint condition, it was still expensive. That’s reflected in the quality of the overall solution and the hardware though. I’ve tried other solutions, such as adapting a Midi Controller with a custom map, but the Tangent devices are in a different league in terms of usability and function, which is reflected in the high price. Beware that if you try the Kb, you will not want to go back to using a mouse to drag a slider….the ability to look at the image as you make fine adjustments through an ‘analogue’ and tactile control is just so much quicker, intuitive and satisfying.

There are a few specific uses not mentioned already that I do use other software for, so here’s a quick summary:

Stitching Panoramas is done using PTGui. I’ve used this for years, works fabulously well.

Focus Stacking is done using Helicon Focus. Again, works very well, and I particularly like the ability to select images based on time taken. So, if you shoot a stack of images and then re-compose and shoot another stack, Helicon can automatically distinguish between the two sets of images if you specify an interval i.e. 30 seconds between the last image in the first stack and the first image in the second stack.

Merging bracketed images to HDR is something not currently available in Capture One, but is also something I find myself doing less and less, given the excellent HDR exposure tools in the application now. Previously I would have used Nik Collection HDR Efex Pro, but I’ve also started using Photomatix Pro which I run directly from inside Capture One, as explained by Thomas Fitzgerald here.

Goodsync is not a photo-processing app at all, it’s a backup/file synchronisation utility. I use it to backup my Capture One sessions from a local SSD to network storage. I talk about this in a bit more detail here.

Disclaimer

Unless I explicit state otherwise, I do not receive any incentive or inducement from the vendor/distributor of any of the products mentioned.

However, some of the links provided may be affiliate links from which I may earn a small commission which helps me to run this website.

Samyang 24mm f/3.5 TS review - part 1

When I first got my Fujifilm GFX50R, at about the same time I got the 45mm and the 120mm macro lenses, but I hesitated over the 23mm lens, one because of it’s cost, but also because I was not sure how much use I would have for for such a wide lens (18mm equivalent).

I hired a 23mm for about 6 weeks from Hireacamera, and this convinced me that this focal length was very useful to me on MF, especially when using the 65:24 (aka ‘XPan’) crop on the camera, and that the lens was of exceptional quality (although I did have a faulty copy that was exchanged - but then hire kit does tend to have a hard life).

Fujfilm GF 23mm on GFX50R in 65:24 ‘Xpan’ mode

However, with the price of the lens having risen back to it’s list price and all discounts seeming to have disappeared, plus my opportunities to use it being very limited, I decided to look at alternates. There was also in the back of my mind that Fujifilm were planning to release a 30mm lens during 2020, and this might be a better fit for me as well as being potentially much cheaper.

I had an on-going project that would definately benefit from the wider lens though, and long story short, I ended up buying a Samyang 24mm f/3.5 tilt-shift lens in Nikon F fit, and a Gobe mount adapter. To put this in context, I could have bought four Samyang lenses and the mount adapter for about the same price as the Fujifilm lens. Of course, there are some notable compromises:

  • Manual focus (not really an issue for landscapes)

  • Inferior image quality at large apertures (not really an issue for landscapes)

  • Stop-down metering (not really an issue for landscapes)

  • Plasticky build, when compared to the native GFX lenses

  • Mount adapter introduces another complication/variable

  • Size - it’s a little longer than the 23mm, even before you add the mount adapter

On the up side though, the Samyang does have some positives:

  • Potential to use a limited amount of tilt and shift

  • Rotating mount and rotating tilt section means tilt and shift axis are independent

  • By most accounts, very good image quality when stopped down to f/8 - f/11

  • Can be easily adapted to use on my Fujifilm X cameras as well

As mentioned, I find this focal length really useful in the ‘XPan’ mode on the GFX. It’s roughly equivalent to a 90mm lens on a 6x17 panoramic film camera (incidently the GF 45mm similarly equates to 180mm on 617).

I hoped I would have the ability to add up to a degree of tilt (all that is usually needed for landscapes), which would make getting the whole image sharp from front-to-back easy. I previously used PC-E lenses on Nikon full frame and cropped-sensor DSLRs, but I did find them very tricky to adjust and wanted to see how easy tilt/shift lenses would be to use with the GFX’s electronic manual focus aids.

Tilt-shift lenses have an image circle that exceeds the size of the film or sensor they are intended to be used with. This is to allow for the shifting of the image, but as the Samyang is intended for use with 35x24mm film, not a 44x33mm sensor, the results would be a bit of an unknown quantity.

I’ll be following this up with a further post once I have had a bit of time to evaluate the Samyang lens on GFX.

Disclaimer

Unless I have explicitly stated otherwise, I actually own or have owned all the products mentioned, and further more, I purchased them myself without any incentive or inducement from the vendor/distributor.

However, some of the links provided may be affiliate links from which I earn a small commission which helps me to run this website.

Choosing tripod legs

You’ll see lots of discussions on various fora about which is the best tripod. Lets start off with my three immutable laws of tripods:

  1. Every single tripod has to balance four qualities, you just have to decide which two are the lowest priority and therefore you can (or must) compromise on

  2. When you buy cheap, you can end up paying twice

  3. A good tripod will last

Qualities

Height. Weight. Stability. Cost.

More stable is heavier or more costly.

Cheaper is less stable and/or heavier.

Light or cheap is less stable and/or shorter.

Less height may mean less weight and more stability, but it’s also less useful (see why you may need a BIG tripod here). I always consider the height with the column down - raising the column usually reduces stability so I would avoid a tripod where you are having to raise the column frequently.

Once you look at all the compromises, you may realise that one tripod may not satisfy all your requirements - the most obvious one being that a big, sturdy one may be unacceptably heavy/large for travel.

Bargain vs Total Cost of Ownership

When considering tripods, I personally think most amateurs and enthusiasts dramatically under budget for tripods, because it considered to be an ancillary bit of kit where some money can be saved (see law 1).

But, a good tripod should last for years. A premium brand one will usually be relatively easy to obtain parts for. But, unless you are constantly drenching your tripod in sea water and/or don’t bother ever doing any maintenance (mostly cleaning!), a quality tripod should go on for years and years. Possibly much longer than some people will hang on to cameras and lenses.

I would say budget between £500 and £1000 for tripod(s) and head(s). Spread that cost over 5 years, it’s possibly a small part of your photographic budget.

Recommended Tripods

It would be easy to say anything by Gitzo, FLM or RRS and end it here.

But let’s be realistic, there are a lot of more economic options available that are worthy of consideration.

So lets talk about what I have, and what I would replace it with today.

The big tall heavy one. I love my Gitzo GT5543XLS. Yes, sometimes it seems a little too heavy, but it is just rock-solid and is seemingly un-phased by gale force winds or driving rain. Going tall is a very good quality that you will really appreciate over time.

But….I probably would not buy it today, instead I would get the Benro TMA48CXL.

Check out the online reviews. You get 90% the height (column down) for 80% of the weight, and you could almost buy three for the price of one Gitzo.

I think this and the Benro GD3WH geared head, which I review in another post here would be my solid recommendation for a landscaper. Shop around and you might even get the pair for less than my minimum £500 budget.

Incidently, I find Mindshift Gears’ tripod carrier to be the best way carry a large, heavy tripod. Although designed for their rucksacks, it can be easily adapted to almost any rucksack - you just need attachment loops on the shoulder straps (which most packs have) and to fashion a loop on the pack to push the legs through.

The light but stable travel one. Oh dear, another Gitzo. I have the GT2545T Traveller, which was a big step up from earlier travellers, it is very stable and light and compact when legs are reversed. A few years ago I would have recommended this as a universal tripod for those who don’t need to go tall or use lenses longer than 200mm equivalent.

Today though, there are quite a few options - I could easily slip another Benro, or a Sirui in here now and have done with it. But, I’m not, because I think Novo Photo make just about the best value product out there today. I have a MP20 monopod (essentially 1 leg of their T20 tripod), and it is excellent, it could easily be mistaken for a Gitzo product at first glance. Impressively, for such a budget range, spares do seem to be readily available on their website.

In comparison to the shorter Gitzo GT2540T, the Explora T20 doesn’t seem to me to be quite as rigid but at less than half the price, including a bag, spikes and five-year warranty it is impressive and great value. Perhaps though the smaller £210 T10 tripod fits the bill more closely for this category.

All Novo tripods are also available in kits with their ballheads - these are similarly excellent, but I’ll have more to say about that in a future post.

The super-light one. There are times when weight takes absolute priority, such as long hikes and when taking a second ‘pod for vlogging etc. Until recently, I would have recommended the Benro Slim Carbon Fibre Tripod with N00 Head (TSL08CN00), currently around £80. It’s comes with a basic but functional ball head with arca clamp, goes reasonably tall, yet weighs 1 kilo all-in. For a light camera, it can work very well, just don’t expect super stability in all conditions. But, crucially, it’s performance exceeds it’s price-point by some margin.

Thing is, Benro themselves made this tripod redundant in my eyes, by launching the Benro Slim Tall Carbon Fibre Tripod (TSL08CLN00), which often can be found for only £20 more. It comes with the same head but is about 12cm taller with the column down, and 18cm with the column up. That may not seem much but in practice it makes a real difference. The weight penalty for that extra height is just 100g.

The do-it-all one. OK, you read this far but still not convinced you need more than one tripod? Simple answer: if height is a higher priority than weight, get the Benro TMA48CXL.

If cost or weight are higher priorities, get the Novo Photo T20 tripod. If budget is really tight, get it in the kit with head for a £70 saving on buying separately.

If your budget can stretch to it, then the Gitzo GT2543L Mountaineer comes close to an all-round balance of weight, height and stability, but at a cost.

Disclaimer

Unless I explicit state otherwise, I do not receive any incentive or inducement from the vendor/distributor of any of the products mentioned.

However, some of the links provided may be affiliate links from which I may earn a small commission which helps me to run this website.

Bargain wildlife lens, thanks Fringer!

I’ll be honest, I tend to prefer primes lenses over zooms, especially long telephoto zooms. May be that just comes down to having previously used prime telephotos (I owned Nikon 300mm f/2.8 and 600mm f/4 for a while).

But, a few years ago when I switched to Fujifilm from Nikon, there really was no option in the long telephoto space, apart from Fuji’s own 100-400mm lens, unless I wanted to try an adapted manual focus lens, which I didn’t. That wasn’t really a problem since part of the reason to change was reducing the weight of my gear, so I plumped for the Fujifilm lens.

But, I’ve never been totally enamoured with the 100-400mm. Now, don’t get me wrong, this is an excellent lens, I just felt that a prime would deliver better imagery out at the long end, and that is mainly where I use this lens, at 400mm. With most tele-zooms, sharpness and contrast do tend to fall away at that long end.

Enter the Fringer EF-FX Pro II adapter. This neat little adapter, about the size of a typical 1.4x tele-converter, allows a Canon EF lens to be attached to a Fujifilm X series camera, whilst retaining auto-focus and exposure. The Pro version adds a nicely detented ring which can control the Canon lens aperture and feeds back the aperture information to the camera body. It all works very well.

The possibility to use a Canon telephoto opens up a world of options, my original intention being to hire super telephotos, or even a tilt-shit lens, as and when required. But when a used Canon EF 400mm f/5.6 L USM lens came up in mint condition at a very reasonable price, I thought I would give it a try. For those who don’t know, this lens is an old and simple optical design dating from the ‘90’s, but is very well regarded for it’s portability, sharpness and solid construction.

Of course the elephant-in-the-room is the lack of image stabilisation. I guess there are two answers here: one, I personally don’t value this so much as mostly my subjects for this lens will be moving, and two, if you really must have this then either go for a Fujifilm X-H1 body (which has in-body stabilisation) or a different Canon lens with IS (note although IS is supported by the Fringer adapter, only the lenses tested by them are supported - there is a list on their website).

Milo helps with testing the Canon 400mm EF f/5.6 L USM & Fringer EF-FX Pro II, Fujfilm X-T2 (straight out of camera jpeg, cropped to 1:1, handheld).

Milo helps with testing the Canon 400mm EF f/5.6 L USM & Fringer EF-FX Pro II, Fujfilm X-T2 (straight out of camera jpeg, cropped to 1:1, handheld).

Another factor that might put people off is the smallish aperture and the ability to get those super-soft backgrounds so your main subject ‘pops’ out of the image. Well, yes, it’s very easy to get that blurry background with a long f/2.8 or f/4 lens, but the downside is depth of field is often so shallow, you will need to absolutely nail focus, not just on your subject, but on a particular part of the your subject. Sometimes this is such a challenge you will find yourself stopping down to give yourself some margin for error in focus anyway.

But even if limited to f/5.6 as your widest aperture, you can get a nice effect: in the image above I got down low to maximise the separation between subject and background. The cat is about 6 meters away, behind him is a wall a further 75cm away. It also helps that the wall was thrown into shadow. Fortunately his face is fairly parallel to the sensor plane, but look how out of focus that extended paw is!

Bottom line is I was impressed with the image quality of the Canon 400mm, and AF performance was very good with the Fringer adapter on the Fujifilm X-T2 (it was also good with the Canon 85mm f/1.8 and 100mm f/2.8 USM macro I tried).

However, to be fair, in my comparative tests the Fujifilm 100-400mm stood up very well indeed. So, I wouldn’t necessarily choose between these options purely on image quality, both are capable of very good image quality. But, if you want to use longer focal lengths, the Fringer adapter unlocks a world of options not available in the Fujifilm system.

Personally, I preferred the handling of the Canon lens. Weight wise, there is little in it once you add in the 140g Fringer - the Canon just edges it but only by about 60g. However, the longer slimmer body of the Canon to my mind is easier to grip and the wider spacing of your hands seems to make it easier to hold steady. To me, it feels more wieldy and perhaps would be a better option for birds-in-flight, for example.

At first sight, the Fujifilm looks more compact….

At first sight, the Fujifilm looks more compact….

….but with hoods extended and at 400mm, there is not much in it.

….but with hoods extended and at 400mm, there is not much in it.

The Canon wins on build, it feels more sturdy because of the metal lens hood, the solid lens barrel (i.e. no extension) and the overall ‘cleaner’ design (i.e. less switches). That’s not to say the Fujifilm isn’t well built, it is, but it just doesn’t feel like it would take as much of a beating as the Canon would. Not much of surprise, given they are close in weight but the Fujifilm has 21 elements to the Canon’s mere 7.

Of course, as mentioned the Canon has no IS, and minimum focus is quite far out at 3.5m (by contrast the Fujfilm gets comfortably under 2m). It also will not auto-focus on the Fringer adapter with the Canon 1.4x extender. The standard lens foot has no arca dovetail and only one mounting bolt, but that is pretty common, indeed the same can be said of the Fujfilm 100-400mm.

For frequent tripod use I would swop out the standard foot for an iShoot replacement (£20), that, despite being no bigger than the Canon foot, has two threaded mounting holes plus a hole for an alignment pin, and also has an arca dovetail on the base. If feels well made and seems solid on first impressions.

The Canon lens come as new with a nice padded bag, and most good used one’s should include that as well. It still accommodates the lens with the Fringer adapter attached.

So to conclude, if you are lusting after longer lenses for your Fujifilm, then for the cost of the Fringer (£300) and a used Canon 400mm (from £500 - £700), you are looking at a considerable saving over a new Fujifilm 100-400, and potentially a small saving on a used one, plus you open an array of Canon lenses for your Fuji camera.

In the end, I did sell my Fujifilm 100-400, with enough to fund the Canon lens and the Fringer, plus a small profit on the deal.

Disclaimer

Unless I explicit state otherwise, I do not receive any incentive or inducement from the vendor/distributor of any of the products mentioned.

However, some of the links provided may be affiliate links from which I may earn a small commission which helps me to run this website.

Filters in the time of digital

Seems like many people now feel that filters for landscape photography are redundant, whilst others still continue to use them much as they did with film. I am mostly in the latter group, but just recently I made some changes which might help you decide.

So, first off, like I said I am a big fan of using filters in my landscape photographs. Here’s the filters I use and why:

Polariser

A polariser helps to saturate colours, control reflections, cut haze and generally give your images a crisp look, especially if there is a lot of small detail, like foliage or pebbles. The effect is also very difficult to successfully emulate in software, so I would say this is pretty much a must-have for landscapes. It’s a simple, subtle, way to elevate an already good image.

Just be aware that if you are including a lot of clear blue sky in your shot when using a wide angle lens, then the polariser can lead to unnatural-looking sky colours, as the intensity of the polarising effect varies depending on the angle to the sun. In those circumstances, if in doubt, take a shot with and without.

Neutral Density

The long exposure ‘Big Stopper’ look has really taken off in the last decade, and I would say at least a couple of these are useful to have in your kit. A 10 stop and a 3 or 4 stop are a good mix. 10 stop will give you that long exposure look in the middle of the brightest day, and a less dense ND does the same in blue hour, plus is useful for smoothing out moving water during the day, especially if used with a polariser that will tend to also extend your shutter speed by an additional 1-stop to 1.5-stops.

One really useful aspect of the 10 stop filter is when the sky in your scene may be a bit boring - even a wisp of cloud can be converted to more interesting streaks and lines by a really long exposure.

ND’s can be variable in quality, with some not being particularly neutral and therefore putting a colour shift on your image, and also the density may not be accurate which can make getting an accurate exposure quite time-consuming. Here’s a top tip from Greg Benz on how to easily and quickly get accurate exposures with a dense filter.

Graduated Neutral Density

This is where the discussion gets more interesting. ND Grads are designed to help you balance the exposure between a bright sky and the darker land. In effect, they help to compress the dynamic range of the scene so it fits more easily into the range of tones your camera can capture. This in turn renders the scene much closer to how our brains interpret it (when we see blue sky and green fields, our camera ‘sees’ bright sky/green fields or blue sky/dark fields, depending on where we set the exposure).

There are two arguments that say grads are no longer necessary with digital. Firstly, you can shoot several shots at different exposures (bracketing) and then merge these later in software. Secondly, many software tools and camera sensors are now very very good at extracting data from the shadow and highlight areas of an image, so a lot of detail can be recovered in post-processing. Greg Benz has posted some great how-to videos here that will help you understand how this works.

Grads coming in different densities, I find 2-stop useful when the light is coming from behind the camera, and a 3-stop more useful then the light is coming from in front of the camera. There are hard and soft transitions between the ND part of the filter and the clear part. Which you choose depends on the scene and the dimensions of your camera sensor (general rule is, the smaller the sensor, the harder the transition should be).

Reverse grads are useful when the sun is low in the sky, especially in coastal scenes. This kind of filter is at it’s most dense at the transition line, and then becomes less dense towards the top of the filter. Because of the brighter nature of the scene, I find these most useful in 3-stop and 4-stop values.

As you’ll see I don’t view the option to use or not use grads as binary, sometimes I do, sometimes I don’t.

Red Enhancer

I have an old glass Lee Red Enhancer filter which is really useful for autumn colours and sunrise and sunset. It’s a subtle effect that just seems to tease out that extra bit of saturation and intensity of reds, whilst leaving the rest of the image largely unchanged. It can also be useful in astrophotography to reduce the effects of light pollution. Lee no longer make these, but similar products exist today marketed as light pollution filters, with a didymium or neodymium coating, such as this one from H&Y.

So what’s my filter kit?

Since I also started to shoot medium format digital at the start of 2020, I also decided to upgrade and replace my old 100mm system resin filters with H&Y 100mm glass square system filters. Their magnetic holder makes adjusting grads easy and I find that their glass filters are a significant step up from my old resin filters in terms of sharpness and lack of colour casts. They are also much more resistant to marks and scratches, in fact the H&Y grads are said to be practically indestructible, being made form Corning Gorilla glass.

Medium Format Filter Kit

  • H&Y Polariser and holder

  • H&Y 2 & 3 stop hard grads

  • H&Y 2 & 3 stop soft grads

  • H&Y 3 & 4-stop reverse grads

All that, plus adapter rings, fits in a Mindshift Filter Hive, attached to the waist belt of my Mindshift Rotation 180 Professional backpack. My Lee Red Enhancer, in a H&Y magnetic frame, goes on it’s own in the waistpack with my camera.

In the main pack is a MIndshift Filter Hive Mini are my ND filters:

  • Nisi 3 stop ND (in H&Y magnetic frame)

  • H&Y 6 ND

  • H&Y 10 stop ND

  • H&Y 10 stop circular ND

That last 10 stop filter fits in the holders’ polariser slot so when using an ultra-wide angle lens it’s still allows the use of a graduated filter, without vignetting, on a Fujifilm GFX 23mm lens (18mm equivalent). As mentioned earlier, I am unlikely to use a polariser with a lens this wide when there is a significant area of sky in the image, so there are few situations where I would use a polariser and a grad at the same time on the 23mm.

APS Filter Kit

For my APS camera I decided that I really wanted to have the option to prioritise compactness and weight over completeness. So even though I can (and often do) use the system listed above with my smaller cameras, I sometimes pare my filters down to a lot less.

The way I do this is, first, I don’t bother with grads. As explained above, there are a lot of ways to get around this during post-processing, or using bracketing. So for APS cameras, I take just three circular filters:

And that’s it. I have these filters in the largest size (77mm) I need, and then use stepping rings to adapt to the lenses I am carrying. I stack these all together with a lens cap on the front and a Gobe metal screw cap on the rear. This makes for a compact and very lightweight package. I was so pleased with this I built a second set to match my smallest/lightest lens set in 58mm diameter, which weighs only 60g and can be slipped easily into to a any pocket.

2020-05-01 14.17.43.jpg

Disclaimer

Unless I explicit state otherwise, I do not receive any incentive or inducement from the vendor/distributor of any of the products mentioned.

However, some of the links provided may be affiliate links from which I may earn a small commission which helps me to run this website.

Benro GD3WH geared head review

Before I switched from film to digital, for a few years with 5x4 and medium format film cameras, I used a Manfrotto geared head. Then digital came along, cameras got lighter and so I started to use ball heads.

As part of my move back to medium format though, I decided that a geared head was just what was needed, to slow me down and add some precision and be more deliberate in composing shots. As I was making a big investment in a big tripod at the same time, I decided to go for a quite economic solution, the Benro GD3WH.

The Benro bears a remarkable resemblance to the Manfrotto 410 Junior head I previously owned, except this time there is an arca-swiss compatible dovetail clamp built into the head, so no need to buy expensive conversion kits or (even worse) be forced to use Manfrotto’s own enormous and antiquated quick release plates. At the time of writing, in the UK the Benro is around £145 and the Manfrotto about £10 more.

The Benro looks well made and feels solid when you take it out of the trade-mark bright blue Benro box, yet doesn’t seem overly heavy. Referring to the manufacturers specs, the Benro is around 400g lighter than the Manfrotto. But at over 800g, it is still quite heavy given it’s max stated load of 6Kg, in comparison to a ball head, which would be substantially lighter and more compact for a similar payload. That is the penalty for the extra precision though.

Like all similar designs of geared head, on a tripod with a large top platform like my Gitzo Systematic 5 series, a spacer is needed to raise the head up to allow for the full range of tilt. Fortunately Benro have thought of this and offer the matching GDHAD1 spacer, albeit at an additional cost of £20.

In use now for about 6 months, I have found the head to be very satisfactory. Like the Manfrotto mentioned earlier, it’s a little ‘agricultural’ in design and feel compared to some of the more exotic (and expensive) geared heads out there, but it definately provides the required precision and rigidity.

I have one dislike, which is that the arca dovetail opposite the clamp is not continuous - there is a gap in the middle of about 30mm - which means you really need to use a plate or L-bracket at least 50mm wide, and pay close attention that it is centred in the clamp, otherwise there is a risk that the camera won’t be clamped securely, and/or the clamp will be damaged when it’s tightened. This is not really a problem for me, as all my L-brackets have dovetail sections that are sufficiently long, but it might be something you should consider if you are using a small plate on your camera (a 70mm plate is supplied with the head).

One other observation: I have seen quite a few pictures with the camera mounted in what I consider to be the ‘wrong’ way round on this head. I find it best to have the clamp knob pointing in the same direction as the lens, as then the knobs for the 3 axis are nicely placed and highly visible. If you flip the camera round, so the clamp knob is facing you, that’s no longer the case.

Overall, I am extremely pleased with this head. I would even go as far as to say it’s performance is beyond what you might expect at the price. There are other geared heads around at similar prices, but I haven’t yet found another one that is geared in all 3 axis, apart from the Manfrotto. I am so pleased in fact, I am considering buying a second as a spare, just in case. But, may be I’ll wait and see if Benro make a Mark II version without that interrupted dovetail.

If you use these links to buy the Benro GD3WH or GDHAD1, I will receive a small commission which helps to keep this site running.

Disclaimer

Unless I explicit state otherwise, I do not receive any incentive or inducement from the vendor/distributor of any of the products mentioned.

However, some of the links provided may be affiliate links from which I may earn a small commission which helps me to run this website

3 reasons to have a BIG tripod

Last year I traded my much-loved and well-used Gitzo GT5531S for a taller version. My old Gitzo got the camera to eye level for me, but increasingly I found situations where a taller version would work better:

Obstacles

Be able to shoot over hedges, fences, walls etc. Just basically giving yourself a slightly different viewpoint. Helps also to separate out foreground objects when the terrain is fairly flat. Obvious really, but best suited to shooting close to the car, because you'll probably need some steps. A geared head and tilting LCD make shooting with camera above head height much easier. I first got this idea from watching Nick Carver on Youtube.

Gitzo GT5543XLS*, Benro GD3WH geared head, GDHAD1 spacer. Lens axis approx 2.2m above ground.

Gitzo GT5543XLS*, Benro GD3WH geared head, GDHAD1 spacer. Lens axis approx 2.2m above ground.

Steep slopes

On hills and mountains, a tripod that just gets to eye level on flat ground can easily become a tripod that only gets your camera to waist level, which can mean that foreground objects get in the way. Longer legs can be extended down the slope, maintaining a higher working height.

High winds

A couple of years ago my old tripod did blow over, with camera on, in NW Scotland, despite being tethered to my rucksack. Fortunately no damage was done, but that did set me thinking. With the new taller version, I can splay the legs out to a wider angle and create a massively stable platform, while still having a good range of working heights.

*There aren't so many options in tall tripods, but for those looking for something more economical, the Benro Mach3 TMA48CXL gets to 90% of the height (higher with column extended) but at 40% of the cost and saving about 0.5kg in weight. I can't vouch for it's stability but Benro generally seem to make solid (haha) products.

Disclaimer

Unless I explicit state otherwise, I do not receive any incentive or inducement from the vendor/distributor of any of the products mentioned.

However, some of the links provided may be affiliate links from which I may earn a small commission which helps me to run this website.